 设备接入(WebSocket 协议)
推荐阅读:
- 《设备接入(概述)》 — 建议先阅读,了解整体架构和消息格式
WebSocket 协议接入,由 yudao-module-iot-gateway 模块的 protocol.websocket 包实现,基于 Vert.x HTTP/WebSocket Server,默认端口 8094,路径 /ws。
WebSocket 是长连接协议,支持上行 + 下行双向通信,适合浏览器端设备模拟、Web 端设备管理等场景。
1. 整体架构
1.1 连接认证
设备通过 WebSocket 连接到 ws://127.0.0.1:8094/ws 后,第一条消息必须是认证请求(method 为 auth),携带 clientId、username、password 三个字段。
认证由 IotWebSocketUpstreamHandler 处理。认证成功后,同一连接上的后续请求无需再携带认证信息。
1.2 消息格式
WebSocket 消息统一使用 IotDeviceMessage 对象,通过 IotMessageSerializer 进行序列化/反序列化。序列化方式通过 serialize 配置项指定,详见 《设备接入(概述)》 的「4.3 消息序列化」章节。
消息的 method 字段标识操作类型:
| method | 说明 | 是否需要先认证 |
|---|---|---|
auth | 设备认证 | 否 |
thing.auth.register | 设备动态注册(一型一密),详见 《设备动态注册》 | 否 |
thing.property.post | 属性上报 | 是 |
thing.event.post | 事件上报 | 是 |
所有上行消息由 IotWebSocketUpstreamHandler 统一处理,内部按 method 路由到不同方法:
| method | 处理方法 | 说明 |
|---|---|---|
auth | #handleAuthenticationRequest(...) | 校验三元组,注册连接,发送上线消息 |
thing.auth.register | #handleRegisterRequest(...) | 一型一密动态注册,返回 deviceSecret |
| 其它业务方法 | #handleBusinessRequest(...) | 校验连接已认证,转发到消息总线 |
2. 配置说明
在网关的 application.yaml 的 yudao.iot.gateway.protocols 中配置 WebSocket 协议实例:
yudao:
  iot:
    gateway:
      protocols:
        - id: websocket-json
          enabled: true                      # 是否启用
          protocol: websocket                # 协议类型
          port: 8094                         # 监听端口
          serialize: json                    # 序列化方式
          websocket:
            path: /ws                        # WebSocket 路径(默认 /ws)
            max-message-size: 65536          # 最大消息大小(字节,默认 64KB)
            max-frame-size: 65536            # 最大帧大小(字节,默认 64KB)
            idle-timeout-seconds: 60         # 空闲超时时间(秒,默认 60)
对应 IotGatewayProperties.ProtocolProperties 通用配置类、和 IotWebSocketConfig 专属配置类。
注意:测试前需确保
enabled设置为true,否则协议不会启动。
3. 快速测试【推荐】
可以通过以下集成测试类快速体验,具体步骤见各类的注释:
| 设备类型 | 测试类 |
|---|---|
| 直连设备 | IotDirectDeviceWebSocketProtocolIntegrationTest |
| 网关设备 | IotGatewayDeviceWebSocketProtocolIntegrationTest |
| 网关子设备 | IotGatewaySubDeviceWebSocketProtocolIntegrationTest |
也可以使用浏览器开发者工具、Postman (opens new window) 或 websocat (opens new window) 等 WebSocket 客户端工具手动测试。
4. 手工测试(直连设备)
下面会用 websocat (opens new window) 命令行工具,以内置的 id 为 25 的 演示设备 (opens new window) 为例进行测试。
当然,你也可以使用浏览器 JavaScript、Postman 等工具。
4.1 连接认证
① 建立 WebSocket 连接并发送认证消息:
# 连接 WebSocket
websocat ws://127.0.0.1:8094/ws
连接成功后,发送认证 JSON 消息:
{"method":"auth","params":{"clientId":"4aymZgOTOOCrDKRT.small","username":"small&4aymZgOTOOCrDKRT","password":"509e2b08f7598eb139d276388c600435913ba4c94cd0d50aebc5c0d1855bcb75"}}
认证成功后返回:
{"id":"ae069d71c59f4577b0caa8830ab27e04","reportTime":1770890578726,"method":"auth","data":"认证成功","code":0}
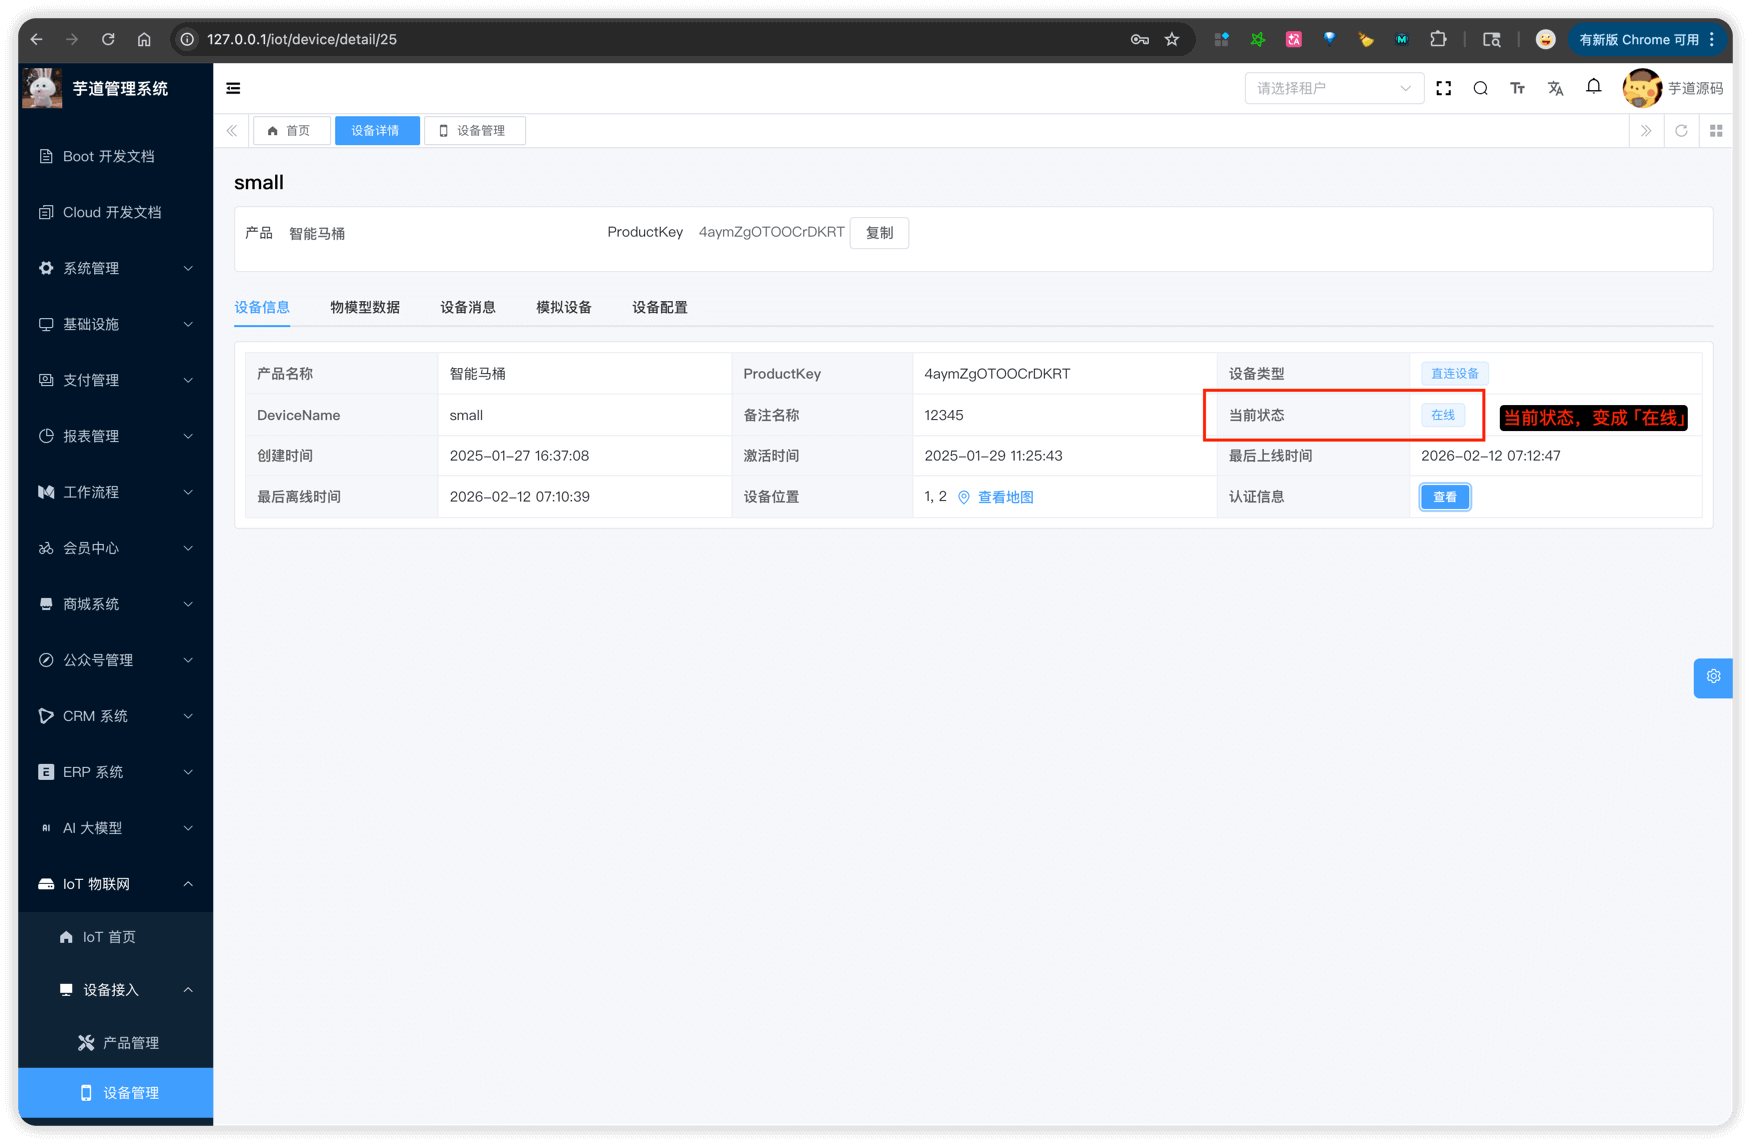
连接认证成功后,网关自动发送 thing.state.update 上线消息。
② 可以在管理后台看到设备状态变为「在线」:
4.2 属性上报
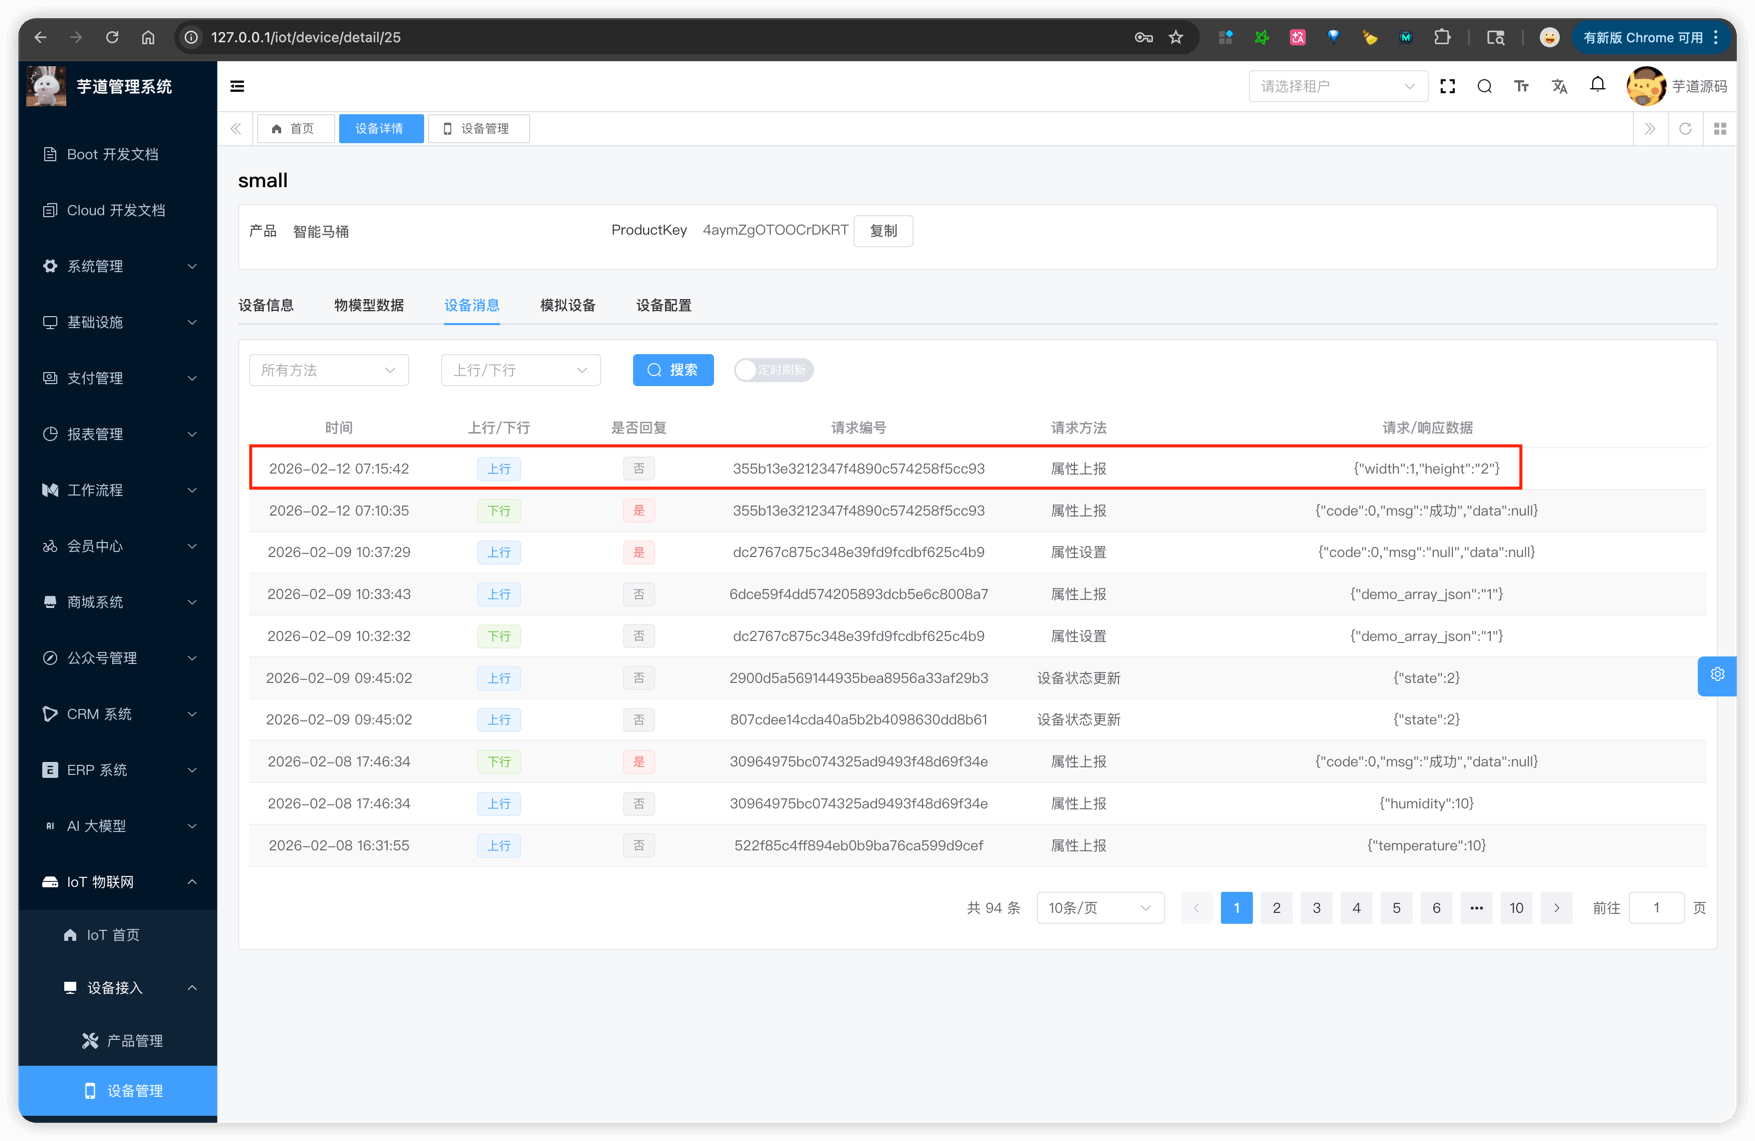
认证成功后,在同一个 WebSocket 连接上发送属性上报消息(无需再携带认证信息)。
① 发送消息:
{"method":"thing.property.post","params":{"width":1,"height":"2"}}
params 为属性键值对,Key 为物模型中定义的属性标识符(identifier),Value 为属性值。
② 可以在管理后台查看上报的属性数据:

4.3 事件上报
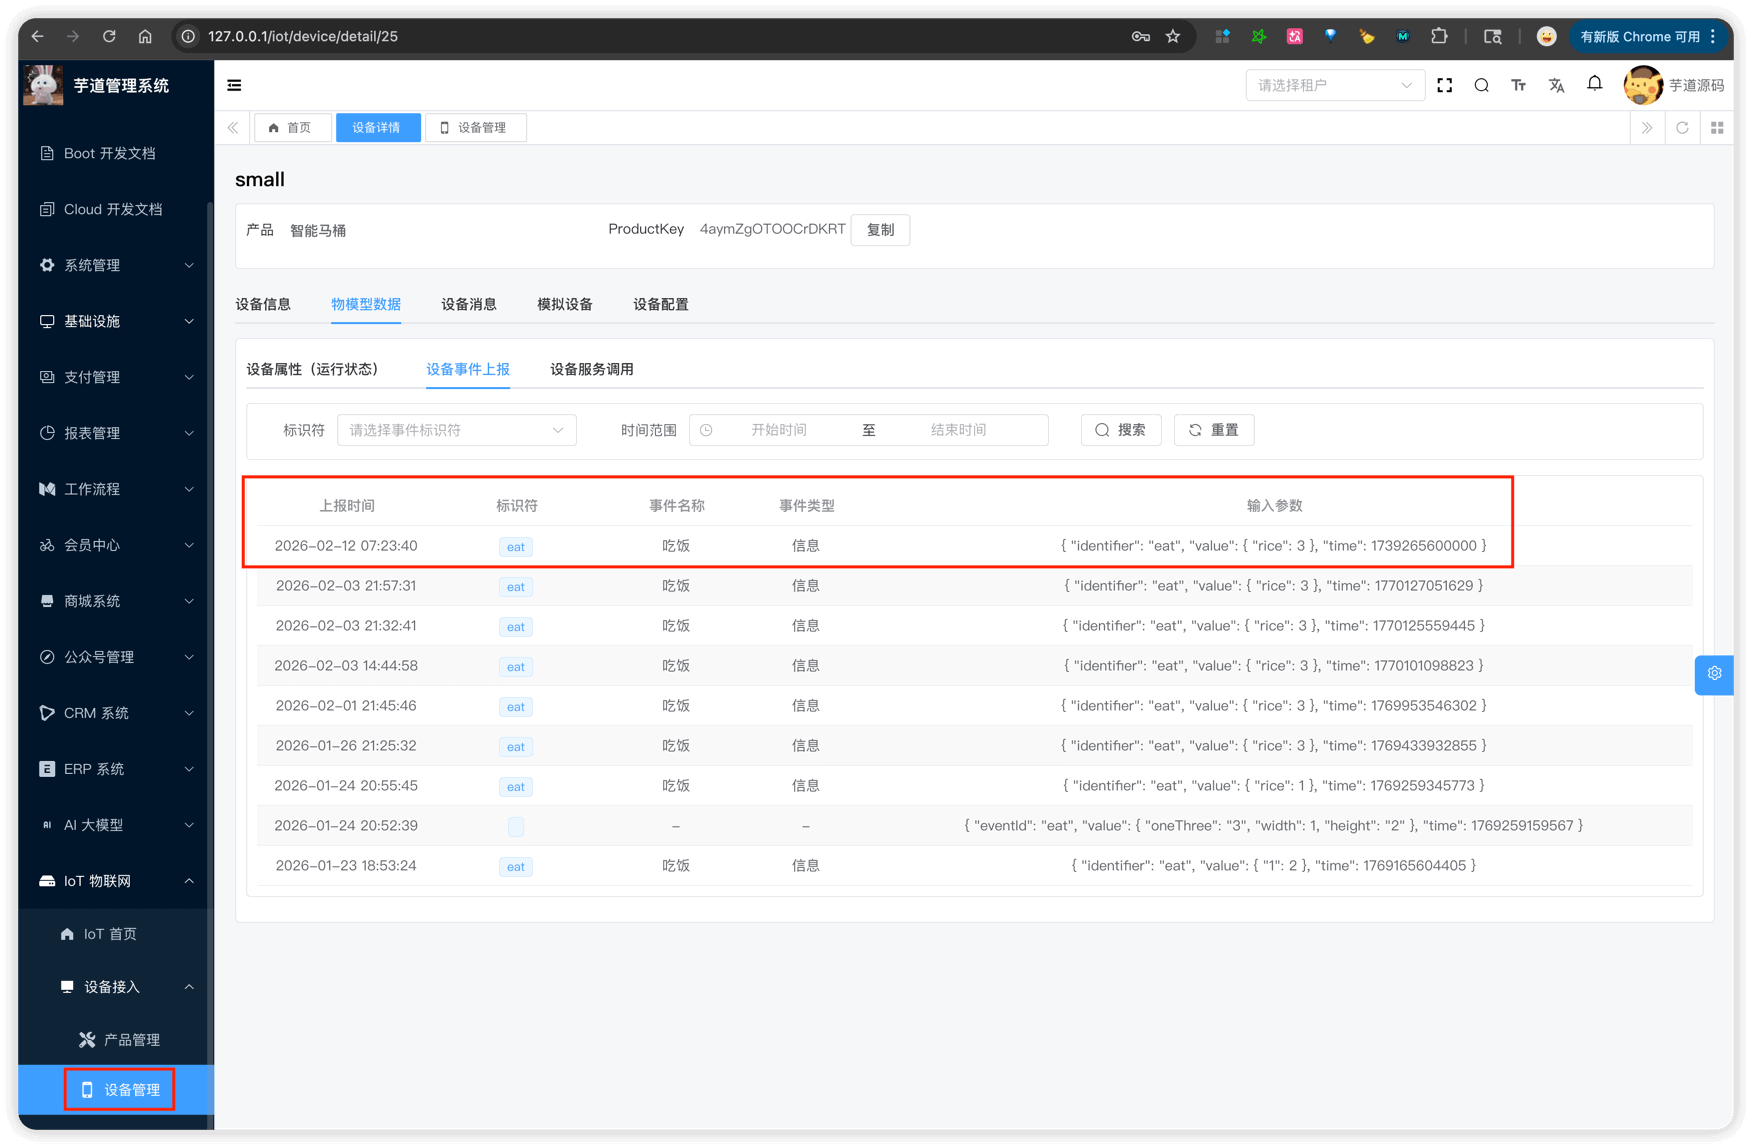
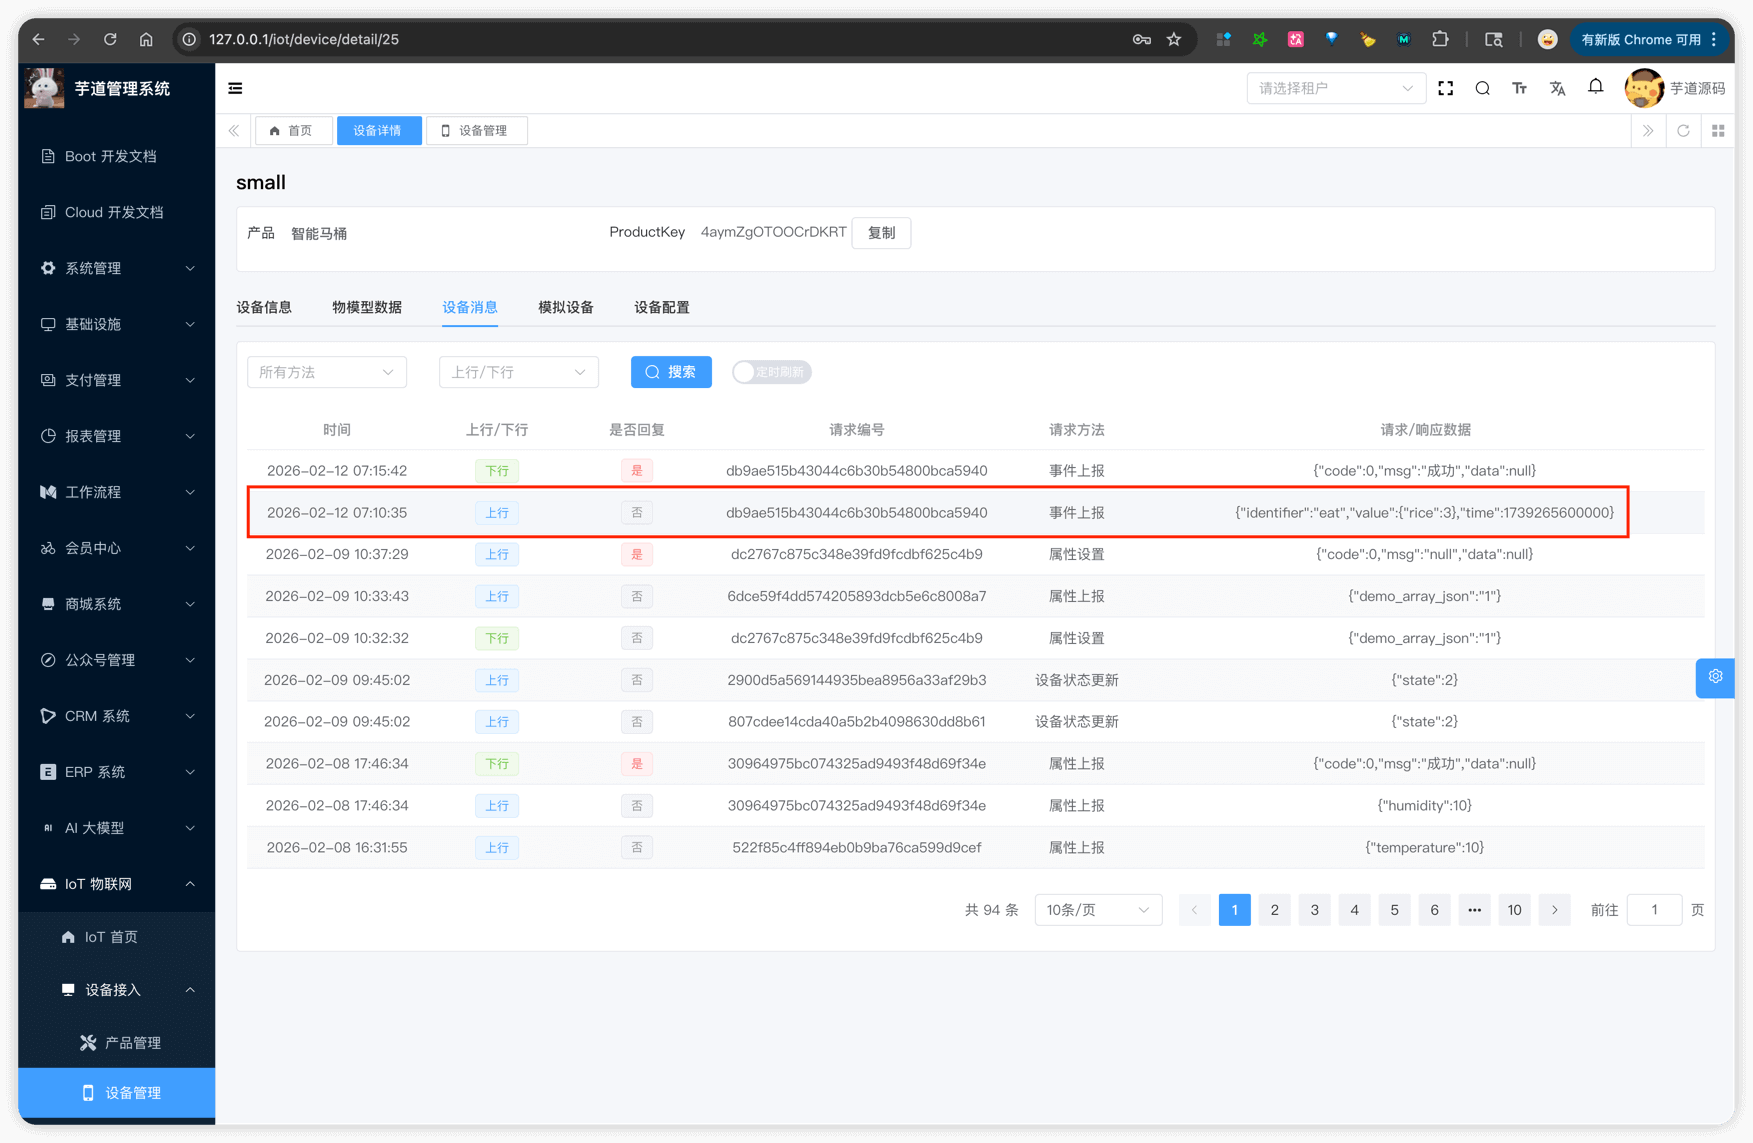
同上,在已认证的 WebSocket 连接上发送。
① 发送消息:
{"method":"thing.event.post","params":{"identifier":"eat","value":{"rice":3},"time":1739265600000}}
params 中 identifier 为事件标识符,value 为事件输出参数,time 为事件发生时间(毫秒时间戳,可选)。
② 可以在管理后台查看上报的事件数据:
4.4 浏览器测试
也可以在浏览器控制台中使用 JavaScript 进行测试:
// 1. 建立连接
const ws = new WebSocket('ws://127.0.0.1:8094/ws');

// 2. 监听消息
ws.onmessage = (event) => console.log('收到:', event.data);

// 3. 连接成功后,发送认证
ws.onopen = () => {
  ws.send(JSON.stringify({
    method: 'auth',
    params: {
      clientId: '4aymZgOTOOCrDKRT.small',
      username: 'small&4aymZgOTOOCrDKRT',
      password: '509e2b08f7598eb139d276388c600435913ba4c94cd0d50aebc5c0d1855bcb75'
    }
  }));
};

// 4. 认证成功后,上报属性
// ws.send(JSON.stringify({ method: 'thing.property.post', params: { width: 1, height: '2' } }));