菜单路由
菜单路由
前端项目基于 Vben Admin 5.x 实现,它已经内置了路由、菜单、权限等功能。
官方文档
强烈建议先阅读 Vben Admin 官方文档,了解框架的基础概念和使用方式:
- 《路由和菜单》 (opens new window)
- 《权限》 (opens new window)【项目采用“后端访问控制”】
1. 路由
项目的路由分为两种:静态路由、动态路由。
1.1 静态路由
静态路由,是指在前端代码中直接定义的路由,不依赖后端接口返回。适用于一些固定的页面,如首页、个人中心等。
静态路由文件位于 src/router/routes/modules 目录下:
1.2 动态路由
动态路由,代表那些需要根据用户动态判断权限,并通过 addRoutes (opens new window) 动态添加的页面,如用户管理、角色管理等功能页面。
在用户登录成功后,会触发 @/store/auth.ts (opens new window) 的 fetchUserInfo 方法,请求后端的菜单 RESTful API 接口,获取用户有权限的菜单列表,并存储到 accessStore 中。
之后,@/router/access.ts (opens new window) 的 generateAccess 方法,会将菜单转化为路由并动态添加。
友情提示:
- 动态路由可以在 [系统管理 -> 菜单管理] 进行新增和修改操作,请求的后端 RESTful API 接口是
/admin-api/system/auth/get-permission-info(opens new window) - 动态路由使用
import.meta.glob实现路由懒加载,参考@/router/access.ts(opens new window) 中的pageMap定义
1.3 路由跳转
使用 useRouter 的 push 方法,可以实现跳转到不同的页面。
import { useRouter } from 'vue-router';

const { push } = useRouter();

// 方式一:使用 path 跳转
push('/system/user');

// 方式二:使用 path 跳转,并设置 query 参数
push('/bpm/process-instance/detail?id=' + row.processInstance.id);

// 方式三(推荐):使用 name 跳转,并设置 query 参数
push({ name: 'BpmProcessInstanceDetail', query: { id: row.processInstance.id } });
推荐使用 name 方式跳转,因为 path 方式在路由路径变更时需要同步修改,而 name 方式更加稳定。
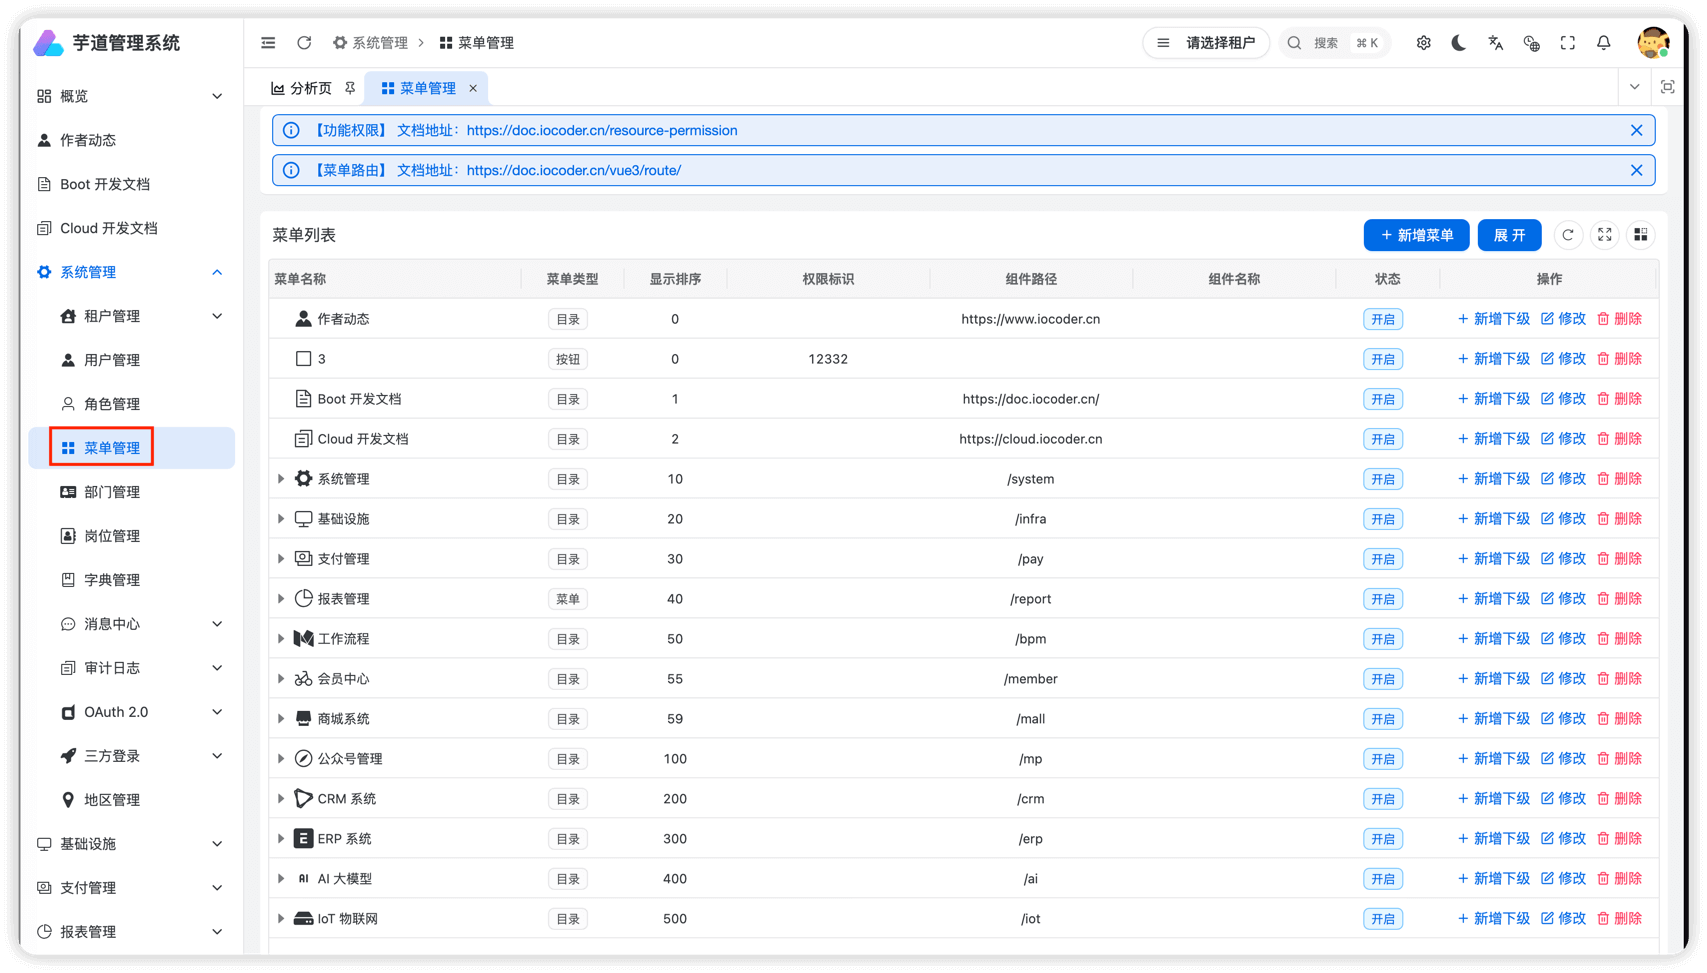
2. 菜单管理
项目的菜单在 [系统管理 -> 菜单管理] 进行管理,支持无限层级,提供目录、菜单、按钮三种类型。如下图所示:
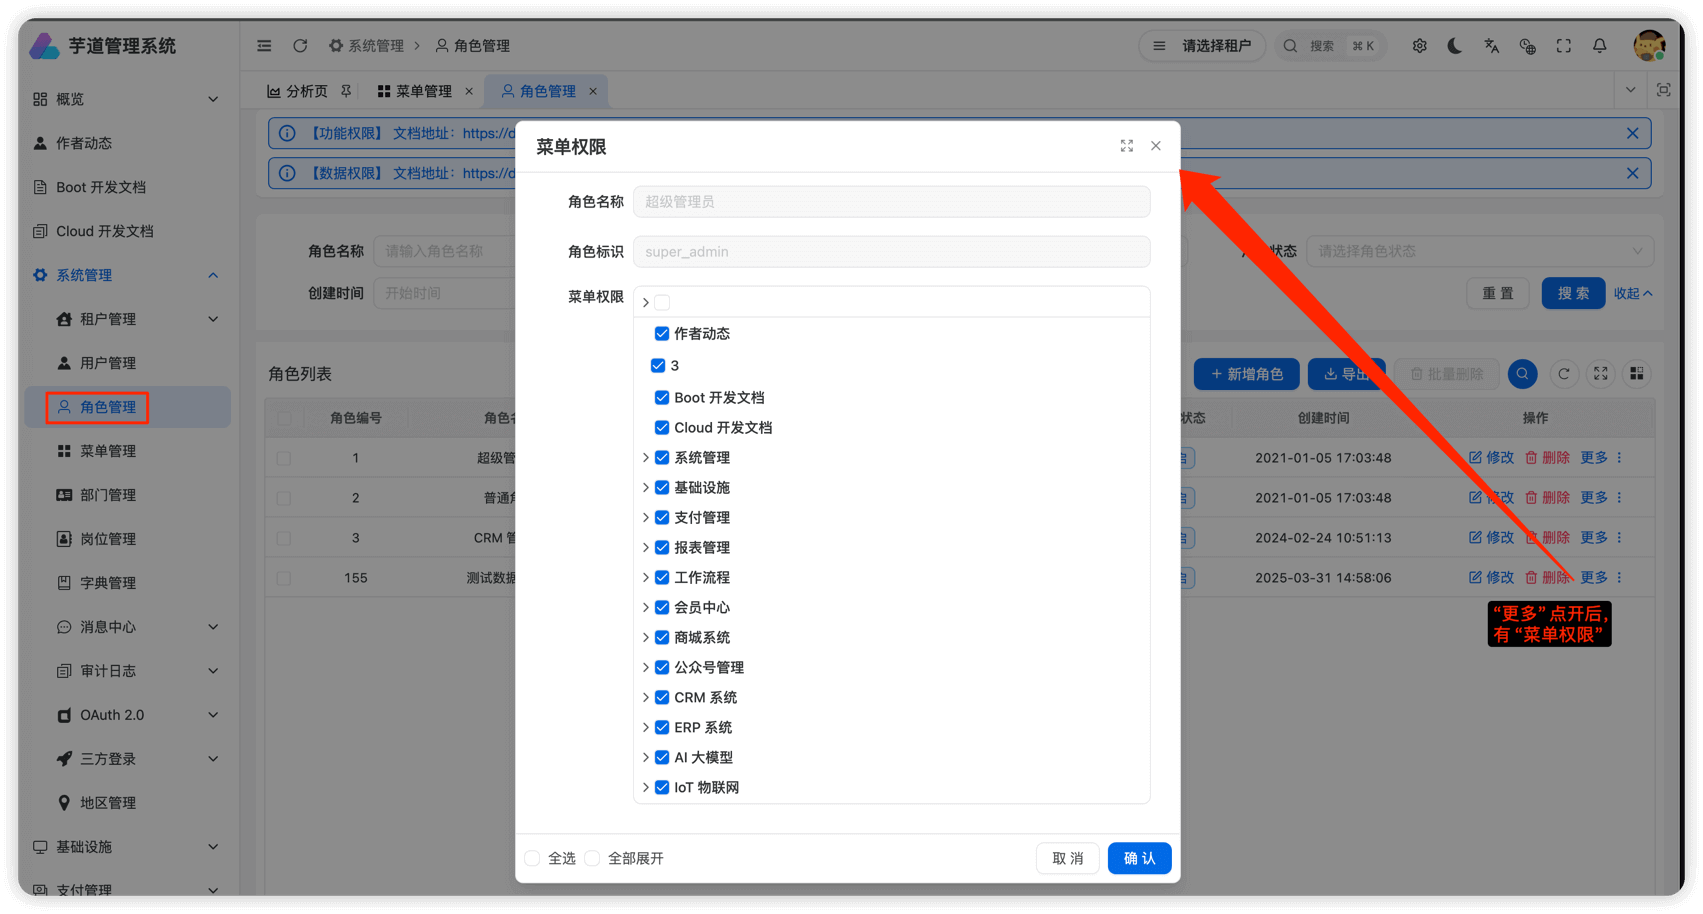
菜单可在 [系统管理 -> 角色管理] 被分配给角色。如下图所示:
2.1 新增目录
① 大多数情况下,目录是作为菜单的【分类】:

② 目录也提供实现【外链】的能力:
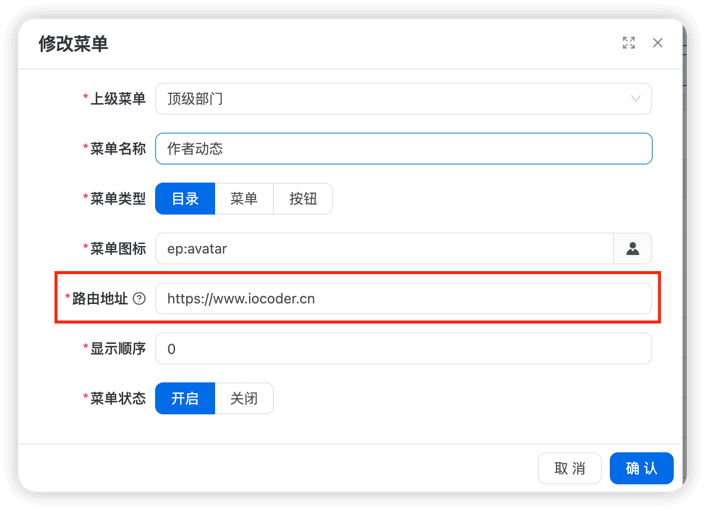
注意,默认会在【新窗口】打开外链接!如果希望通过 iframe 内嵌打开,则可以在外链拼接上 ?_iframe 参数即可。
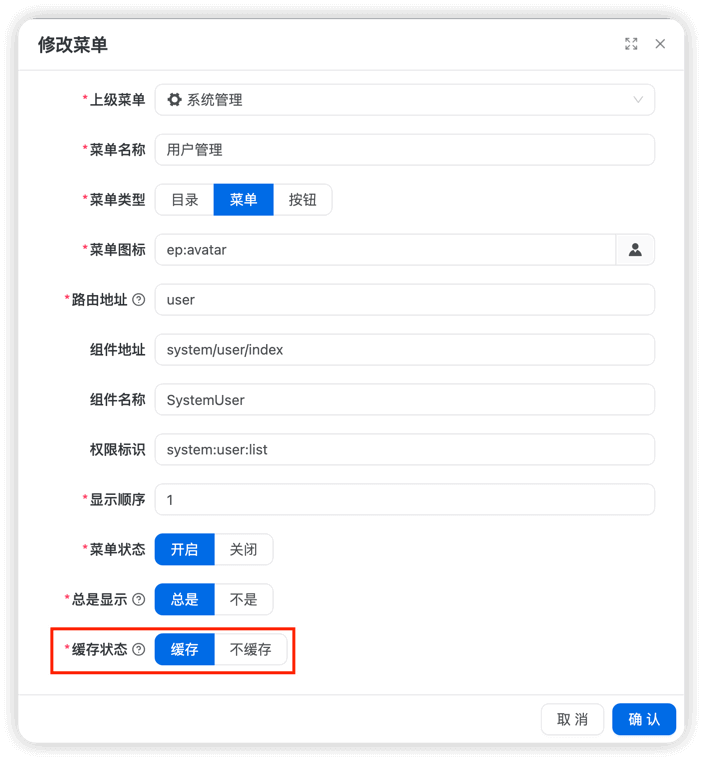
2.2 新增菜单
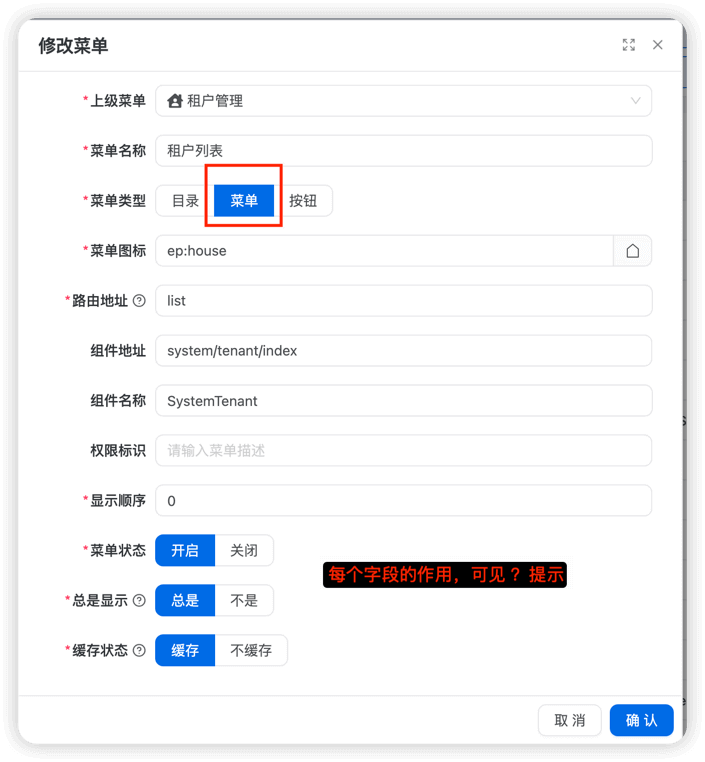
注意,“路由地址”可以通过 ? 拼接查询参数 (opens new window),实现传递参数的功能。
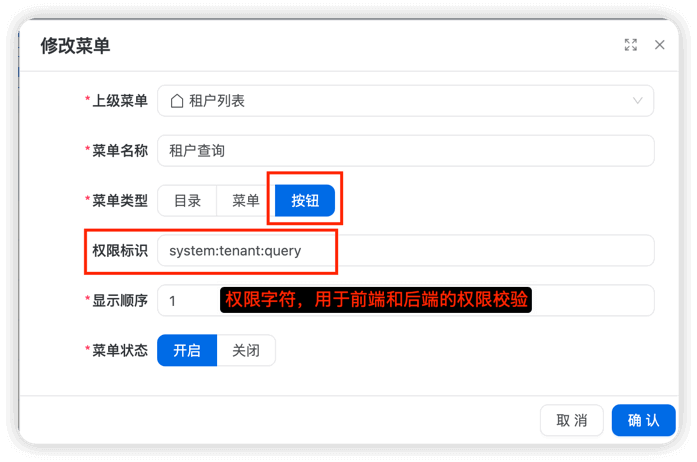
2.3 新增按钮
3. 权限控制
前端通过权限控制,隐藏用户没有权限的按钮等,实现功能级别的权限。
友情提示:前端的权限控制,主要是提升用户体验,避免操作后发现没有权限。
最终在请求到后端时,还是会进行一次权限的校验。
更多可阅读 《权限》 (opens new window) 的「按钮细粒度控制」。
另外,项目的 TableAction 组件的 auth 属性,可进行按钮级别的权限控制。示例如下:
<template>
  <Grid table-title="岗位列表">
    <!-- 工具栏按钮 -->
    <template #toolbar-tools>
      <TableAction
        :actions="[
          {
            label: $t('ui.actionTitle.create', ['岗位']),
            type: 'primary',
            icon: ACTION_ICON.ADD,
            auth: ['system:post:create'],
            onClick: handleCreate,
          },
          {
            label: $t('ui.actionTitle.export'),
            type: 'primary',
            icon: ACTION_ICON.DOWNLOAD,
            auth: ['system:post:export'],
            onClick: handleExport,
          },
        ]"
      />
    </template>
    <!-- 行操作按钮 -->
    <template #actions="{ row }">
      <TableAction
        :actions="[
          {
            label: $t('common.edit'),
            type: 'link',
            icon: ACTION_ICON.EDIT,
            auth: ['system:post:update'],
            onClick: handleEdit.bind(null, row),
          },
          {
            label: $t('common.delete'),
            type: 'link',
            danger: true,
            icon: ACTION_ICON.DELETE,
            auth: ['system:post:delete'],
            popConfirm: {
              title: $t('ui.actionMessage.deleteConfirm', [row.name]),
              confirm: handleDelete.bind(null, row),
            },
          },
        ]"
      />
    </template>
  </Grid>
</template>
- 实战案例(antd):apps/web-antd/src/views/system/post/index.vue (opens new window)
- 实战案例(ele):apps/web-ele/src/views/system/post/index.vue (opens new window)
4. 页面缓存
开启缓存时,需要将 keepAlive 设置为 true,如下所示:
4.1 静态路由的示例
router 路由的 keepAlive 声明如下:
{
  path: '/system/notify-message',
  component: () => import('#/views/system/notify/my/index.vue'),
  name: 'MyNotifyMessage',
  meta: {
    title: '我的站内信',
    icon: 'ant-design:message-filled',
    keepAlive: true, // 开启页面缓存
  },
}
4.2 动态路由的示例